
A Legend in Four Microphones – The Glyn Johns Drum Recording Method
Learning his trade in the Sixties, engineer and producer Glyn Johns knew the environment of the low-track recording world. Yet, as track counts increased, Johns’ technique for miking drums didn’t change.
Rather than resulting in outdated, low-quality drum sounds, Johns was responsible for the sound of some of rock music’s most iconic records.
Producing and engineering artists such as The Beatles, Rolling Stones, Steve Miller Band, Led Zeppelin, Bob Dylan, Neil Young, Eric Clapton and countless others, Johns’ simple drum technique produced world-class results.
So, what’s the secret?
There’s none, really, as long as you have mics of reasonable quality, a room large enough to handle a drum kit, a decent drummer and good-sounding kit.
The Microphones
When you’re working with the top artists on the planet at the heights of their careers, you’ll have access to the best microphones on the market. But that doesn’t mean you’re out of luck if you only have access to affordable options. After all, you only need four.
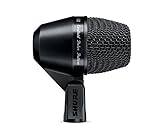
Kick Drum Mic
 The foundation of most band music, the kick drum warrants its own microphone. Placed either inside the drum itself or outside the passive head, this mic is usually, though not always, a dynamic mic.
Dynamics can handle the high sound pressure level and have a natural compression that generally works well with rock and dance music.
The Top Line: Electro-Voice RE-20 (Amazon)
Mid-Level: Audix D6 (Amazon)
Economy: Shure PGA52 (Amazon)
Shure PGA52 Dynamic Microphone - with Cardioid Pick-up Pattern, Swivel-Mount Dynamic Kick-Drum Microphone (PGA52-XLR)
- Tailored microphone cartridge design specifically for low frequency clarity
- Swivel joint with quick release latch with a design similar to bicycle component-locking technology for extremely quick and easy positioning
- Cardioid polar pattern picks up audio from the source while rejecting unwanted noise
Note: Sponsored link
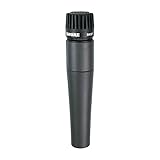
Snare Drum Mic
 The snare is a strange beast and there are nearly as many ways to record them as there are engineers. However, nearly everyone has, at one time or another, used the venerable Shure SM57 microphone.
Also dynamic with natural compression, the SM57 is a no-brainer. It has a street price of about $100, it’s nearly indestructible and virtually every studio in the world has a handful.
You can utilize pretty much any full-range dynamic mic on the snare, and some, such as the Sennheiser e604, have nice, compact forms that don’t get in the drummer’s way, but why not use the affordable mic on which the pros often depend?
Beware the online deals offering new SM57s for substantially less than $100. This popular mic is frequently faked, and these aren’t much better than using a busted telephone for recording.
The Top Line: Shure SM57
Mid-Level: Shure SM57
Economy: Shure SM57
Shure SM57 Dynamic Instrument Mic - Professional Quality and Versatility for Live Performances and Recording - Contoured Frequency Response, Durable,...
- VERSATILE INSTRUMENT RECORDING - The SM57 excels in capturing the true essence of instruments, making it perfect for studio recordings or live performances.
- EXCEPTIONAL DURABILITY - Built like a tank, the SM57 is known for its rugged construction, ensuring it can withstand the demands of any environment.
- PRECISE INSTRUMENT REPRODUCTION - With its tailored frequency response, the SM57 captures the nuances and details of instruments with clarity and accuracy.
Note: Sponsored link
Overhead Mics
The final two mics are generally best if they’re matched to some degree. These two will create the stereo picture, the space that give drums a three-dimensional feeling. While you can spend lots of money buying a pair of electronically and acoustically matched sets, that’s usually overkill for drums. A pair of the same model typically works fine.
Condenser mics are the choice here. The overheads capture the overall drum kit, with an emphasis on the mid to upper frequencies. The impact and sizzle of cymbals can be a challenge for many dynamic mics, but they’re right at home with condensers.
Though they come in all shapes and sizes, the most common are large diaphragm and small diaphragm formats.
Generally, large diaphragms get the nod for drum overhead duties, but if you have a pair of small diaphragm – often called “pencil condensers” – go for it.
Condenser mics across the board have faithful sound reproduction and crisp detail.
The Top Line: Neumann U 87 Ai (Amazon)
Mid-Level: Rode NT1-A-MP matched pair (Amazon)
Economy: Behringer C-4 matched pair (Amazon)

Behringer C-4 2 Matched Studio Condenser Microphones
- 2 matched condenser microphones for stereophonic studio recording and live applications
- Ideal as main and support microphones for studio and live applications
- Cardioid pickup pattern for effective feedback elimination
Note: Sponsored link
Mic Placement for the Glyn Johns Technique
The Glyn Johns Method requires one very special piece of equipment that you may not expect to have in your engineer’s toolkit: a tape measure. It’s essential for the best sound that your overheads are placed precisely the same distance from a certain point to establish a coherent phase relationship. Let’s look at the placement of all the mics.
Kick Drum Mic Placement
If you’re looking for a punchy, thick sound with an emphasis on the pedal beater, you’ll probably place your kick mic at a port in the passive drum head, or completely inside the shell, if there’s no second head.
For warmer sounds, perhaps jazz or folk, where the kick has two full heads, your mic will be a few inches from the passive head. In all cases, change your mic placement to capture the best sound before turning to equalization on your mixer.
Snare Drum Mic Placement
The beauty of the SM57 as a snare mic is its versatility, consistency and ability to take a beating. The most common placement is with the flat capsule end pointing down to the top head of the snare, typically at about the 11 o’clock position as viewed from the drum throne.
Start with the end of the mic about one inch from the head, parallel with its surface, and then point the mic more toward the center to change the balance until you get the sound you’re after.
For both audio and performance reasons, keep the mic out of the drummer’s way as best you can, but don’t worry about the SM57 being hit. A common engineer’s joke is that they don’t work right until they’re roughed up a few times.
If your sounds are too bass-heavy, back the mic off a bit, and if there’s not enough bottom end, move it a little closer.
Overhead Mic Placement
The overhead mic pair is where precision is necessary. Set the first overhead directly over the snare drum, about three to four feet above, pointing directly down. When it is in place, measure the distance from the head of the mic to the point directly underneath it, perhaps the center of the snare or a point on the rim. Take note of the precise distance.
The second overhead is perhaps better described as a “beside” in this case. This mic is set up to the right of the drummer, pointing over the center of the floor tom, with its head pointing at the same spot on the snare drum as the first overhead.
The second mic must be exactly the same distance from that spot as the first. If not, funny things may start happening to the sound of the snare drum.
Adjusting the Balance
 One of the secrets to successful engineering is moving the microphones until you have the best possible sound without adding any electronic sweetening such as EQ.
The effort you put in with mic placement pays off throughout your project. Though virtually every engineer is guilty at one time or another, “fixing it in the mix” is a recipe for trouble.
Pan the kick and snare mics to the center. The first overhead pans to the left, but only to about the 10 o’clock position, while the second overhead is panned hard to the right.
Adjust the relative levels of the four mics until you have a good overall drum. If not, work that mic placement! Only then should you consider EQ, compression and reverb.
Other Considerations
Many discussions on the Glyn Johns technique assure you that, if you don’t have a world-class drummer or perfect room or ideally tuned kit, you can’t get a good sound.
To be sure, all of those things help, but consider that Led Zeppelin recorded in a house that Jimmy Page arranged only after he balked at the cost of renting the Rolling Stones mobile studio at Mick Jagger’s house. At one point, John Bonham’s kit was set up in the hall at the base of a staircase.
Good sound is where you find it, and great recordings do come out of less than perfect conditions. There’s no guarantee that your first attempts at recording drums with this method will work. However, you learn nothing from the recording that you don’t do because your mics aren’t good enough or the drums aren’t perfectly tuned.
Get out there and do it. It’s simply the best way to learn the techniques and develop your personal recording style.