
How to Record Music at Home – a Beginner’s Guide (Infographic)
If you’ve decided that you want to get into home recording, you might already be overwhelmed with questions. There’s a lot to learn, after all. Luckily, the barrier to entry is lower than it’s ever been, with music recording equipment and software becoming cheaper and easier to use than ever before.
There is a lot of information out there already, but it’s easy to get confused. That’s why I’ve put together this beginner’s guide to help demystify the process of home recording, and get you on your way to turning your ideas and songs into solid recordings that you’ll be proud to listen to and share with the world.
Here’s the infographic, and you can read the full post below:

First Things First
Before you get started, you should know the answers to a few key questions:
How Much Money Will it Cost?
If you’re getting started from scratch, one of the first things you’ll want to know is how much money it will cost. This will depend based on your goals, but if you already have a halfway decent computer or laptop then you can expect to pay around $300 for a basic setup with one decent microphone and everything you need to record your first track.
There are a few things to think about when considering cost. For example: how many tracks do you need to record at the same time?
It’s not uncommon to use 6-8 microphones to record a full drum kit. Not only will you need the microphones, stands, and cables, but you’ll need to have an audio interface that has enough inputs to hook everything up.
Don’t think you need to go out and buy a dozen mics just to start recording. You can always start with one or two and slowly build a collection from there. You can even do a great job of recording drums with 2-4 microphones, but more on that later..
How Much Time Will it Take?
Learning to record audio can have a steep learning curve, but if you keep at it then you’ll quickly find that it’s just a matter of learning a lot of small steps. Learning the overall process can be done rather quickly, but this is a subject where there’s always more to learn. The good news is that it gets easier over time, and once you know how the basics work, then you can focus on one thing at a time.
What is a DAW?

Screenshot of a Pro Tools session
DAW is an acronym for “Digital Audio Workstation.” This is a system that lets you record, edit, and mix audio. DAWs can be hardware-based, like an all-in-one unit that can handle all the jobs needed to produce music, but in this case we will be focusing mostly on software DAWs, which is really nothing more than a computer program.
What is Multi-tracking?
Multi-tracking is the process of recording each microphone or sound onto their own separate tracks. This allows each element in a song to be tweaked and edited on an individual basis, and is what allows you to really take control of your project. The process of mixing involves taking many individual elements of a song (tracks) and making them work together, ultimately so you can bounce them all down to a two channel, stereo mix.
Multi-tracking is a powerful thing. It allows you to capture each element individually, giving you total control of every aspect of your mix.
Once you get to the point where you’re able to get some mics up and record some tracks, you’ll quickly learn that it’s not just as easy as hitting “record” and calling it a day. Here’s where the fun part comes in – mixing – and this is an art that will take the most time to get good at.
What Equipment Do I Need to Start Recording?
Computer / DAW
Your computer doesn’t need to be amazing in order to start recording, however it helps to have a good processor and lots of RAM. When you start working with more elaborate projects and layering multiple tracks is where some extra horsepower in the processor and tons of RAM will be necessary.
If you’ll be working on a PC, I recommend 8 GB or more RAM. but you could realistically get started with 4GB. When you start working with multiple tracks and adding effects, the plugins will eat up RAM rather quickly, so eventually an upgrade may be required.
Mac vs PC
These days, it really just boils down to personal preference. A lot of professional recording studios use Macs, but most popular DAWs will work across multiple systems. It is also possible to build a very powerful Windows PC at a fraction of the cost, so there’s that.
Aside from personal preference and cost, you’ll also need to consider which equipment you plan to work with. There are some high end recording interfaces that only work on Macs, so you need to think of the software and hardware as a pair.
Recording Interface

A recording interface is one of the most important aspects of your rig. This is basically a device that allows you to take your incoming microphones or audio from another source, and connect it to your computer so that you can record it into your DAW and start working with it.
Most interfaces will connect to your computer using either USB or Firewire. They start at about $100 like the Focusrite Scarlett Solo (Amazon) pictured to the right, but can cost well over $1,000 for a higher end unit that offers more channels, I/O (inputs and outputs) and premium preamps and converters. I’ll discuss preamps, converters, and interfaces more in-depth in a future article.
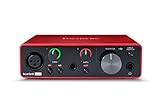
Focusrite Scarlett Solo 3rd Gen USB Audio Interface, for the Guitarist, Vocalist, Podcaster or Producer — High-Fidelity, Studio Quality Recording,...
- Pro performance with the finest pre-amps - Achieve a brighter and a more open recording thanks to the best performing mic pre-amps the Scarlett range has ever seen....
- Get the perfect guitar take - There’s no need to sacrifice your tone with the high headroom instrument input when recording your guitar and basses. Capture your...
- Studio quality recordings for your music and podcasts - You can achieve professional sounding recordings with Scarlett’s high-performance converters which enable...
Note: Sponsored link
Microphones
If you’re just starting out, it’s probably a good idea not to go overboard with buying microphones. I would recommend to start out with one or two, and you can build your collection from there once you are ready to move on. You can read more in-depth about all the different types of mics and how they work, but for now let’s talk about the two most popular kinds of mics – dynamic and condenser.

The Shure SM58 is a dynamic microphone that is popular for live and studio vocals
- Dynamic Microphones – Dynamic mics are very versatile, and can handle a wide range of volumes. They can work well for everything from vocals to drums, and generally can withstand a fair amount of abuse without getting damaged.

Rode NT-2 Condenser Microphone
- Condenser Microphones – Condenser mics work differently than dynamic microphones. In general, they are more sensitive and excel at capturing detail. They can be used on anything from drum overheads to vocals.
Shure has put together one of the best resources available about the topics of microphones and mic placement techniques and made it available for free. See the pdf version here and make sure to bookmark it for later!
Mic Stands
Mic stands are necessary for obvious reasons. They can range in price from $20 to over $100 depending on quality. It’s definitely not necessary to go crazy and buy the highest end microphone stands as a beginner, however I always recommend to buy a good sturdy one. The cheapest of mic stands can be rather flimsy, which can transfer vibrations through the microphone and affect your sound.
Pop Filter
 You’ve seen these. Pop filters are always recommended for recording vocals, because they are the best way to cut back on “plosive” sounds – those hard “b’s” and “p’s” that cause a burst of air to hit your microphone’s capsule and result in an undesirable popping sound. This screams “amateur” and can easily be avoided.
Pop filters come in a couple varieties. The cheaper ones use nylon material to help diffuse the air, and while these are better than nothing, I would highly recommend to spend just a few bucks more and get the style that uses a metal grille. I’ve found that these do a MUCH better job and are definitely worth the extra investment.
I’ve seen a demonstration that really nailed the point on this. A person held up a lighter, and blew through a nylon pop filter. The flame blew out right away. Then the person tried the same experiment with one of the metal pop filters instead, and guess what? No matter how hard they tried, they simply could not blow the flame out.
Cables
The most common cables that you’ll need to know about are microphone and instrument cables.
Microphones all use a standard cable that have three-pronged XLR connectors at each end. The terms “microphone cable” and “XLR cable” are used interchangeably but both mean the same thing. These cables can go from very cheap to very expensive, and the quality can vary greatly too. This is one of those times when the “you get what you pay for” mentality can ring true.

XLR Connectors
If you can afford it, I would always recommend to spend a little extra money on higher quality mic cables. You’ll find that cheaper cables can eventually short out, and sometimes can even be wired incorrectly from the factory.
Instrument cables use 1/4 inch connectors, called TRS (Tip / Ring / Sleeve) jacks. These are commonly used to connect components together. A topic that confuses many beginners is that these cables come in two varieties: balanced and unbalanced.
There are plenty of resources that discuss the differences between balance and unbalanced TRS cables, so please check out this article for a more in-depth description of each. In general though, using balanced cables to connect your gear will result in less noise being introduced to your signal and will result in a cleaner sound, especially when your cables are longer.
Studio Monitors / Reference Monitors
 If you plan to get serious with recording, a nice pair of reference monitors are a must-have. Monitor speakers can get rather pricey, but can also make a huge difference in the overall quality of your mixes.
What’s the difference between regular speakers and studio reference monitors, you ask?
Studio monitors are meant to have a flat response rate. This means that they don’t flatter your sound like regular bookshelf speakers do by artificially boosting some bass and other frequencies at fixed points.
The goal of reference monitors isn’t necessarily to make things sound good, but rather to make them sound accurate. This way, when you make adjustments during mixing, you are hearing what’s actually happening.
This should ultimately mean that if you get your mix sounding good on your monitor speakers, you mix should translate well and sound good on all speakers. Some studio monitors, such as Yamaha NS-10’s are infamous for sounding harsh or ugly, but the logic works as such that if you can get your mix sounding good on them, then you’re golden.
Studio Monitor Headphones
Like mentioned above with studio monitor speakers, monitor headphones are designed to provide a flat frequency response so that you can hear what is actually going on in your mix without hearing artificially boosted bass and other frequencies.
Some people like to do 100% of their mixing on monitor headphones, although this is a debate that you’ll see in the message boards. In a perfect world, you would have a perfectly tuned control room with great acoustics, and good monitor speakers. In practice, you might be working out of your bedroom or a basement studio with terrible acoustics, and that’s when it’s not necessarily a bad idea.
Getting Ready to Record
If you’ve got a grasp of the basics and already own the essential equipment, such as a recording interface, microphone, and cables, then you’re ready to record your first track. Let’s walk through all the steps to get things hooked up and ready to go.
Installing Drivers
The very first thing you’ll need to do is make sure you have the software or drivers installed that came with your recording interface. For now, I’ll assume you’re working with a USB interface. If you’re working on a Mac, you may not need to install additional drivers depending on your interface.
If you’ve got a Windows-based PC or laptop, then the first thing you should do is install the drivers for your interface either from a CD-ROM if it came with one, or better yet, go to the manufacturer’s website to download the drivers to make sure that you’re getting an up to date, and presumably the most stable version of the drivers.
Setting up Your DAW / Recording Software
There are plenty of options at your disposal for DAW software. If you’re on a Mac, then I would recommend either Reaper or Garage Band. If you’re a Windows user, you could try Audacity, which is totally free, although I would highly recommend getting started with Reaper.
Reaper is a great program that’s easy to use, and also free for 30 days. After 30 days, you can either buy the license (which is still very cheap compared to other programs out there – around $65) or otherwise you can continue using it, but it will make you wait for 5 seconds before the program fully starts.
I like Reaper because it has all the features that you’ll need, it is lightweight (meaning small file size), and constantly updated. This is why it has been gaining lots of popularity over the past few years, with a loyal user base.
For the rest of this article, I’ll be showing how to record your first tracks using Reaper. This is because it works great on Mac and PC, and is easy to use while offering all the features that you need.
Configuring Your Interface
Once you’ve got your software of choice selected and installed, it’s time to make sure that your recording interface is configured properly and set up so that you can start to use it.
If you’re using Reaper, you’ll want to go to PREFERENCES > AUDIO > DEVICE and choose your interface from the “Input Device” drop down list. If your interface does not show up here, you’ll want to double check that you’ve got the correct drivers installed.

Recording Your First Track in Reaper
In the next section, we’ll get into the nuts and bolts of creating a new session, laying down some tracks, and making your first mixdown. Check out the video below for a good overview of getting set up and some of the basics:
Creating a New Track
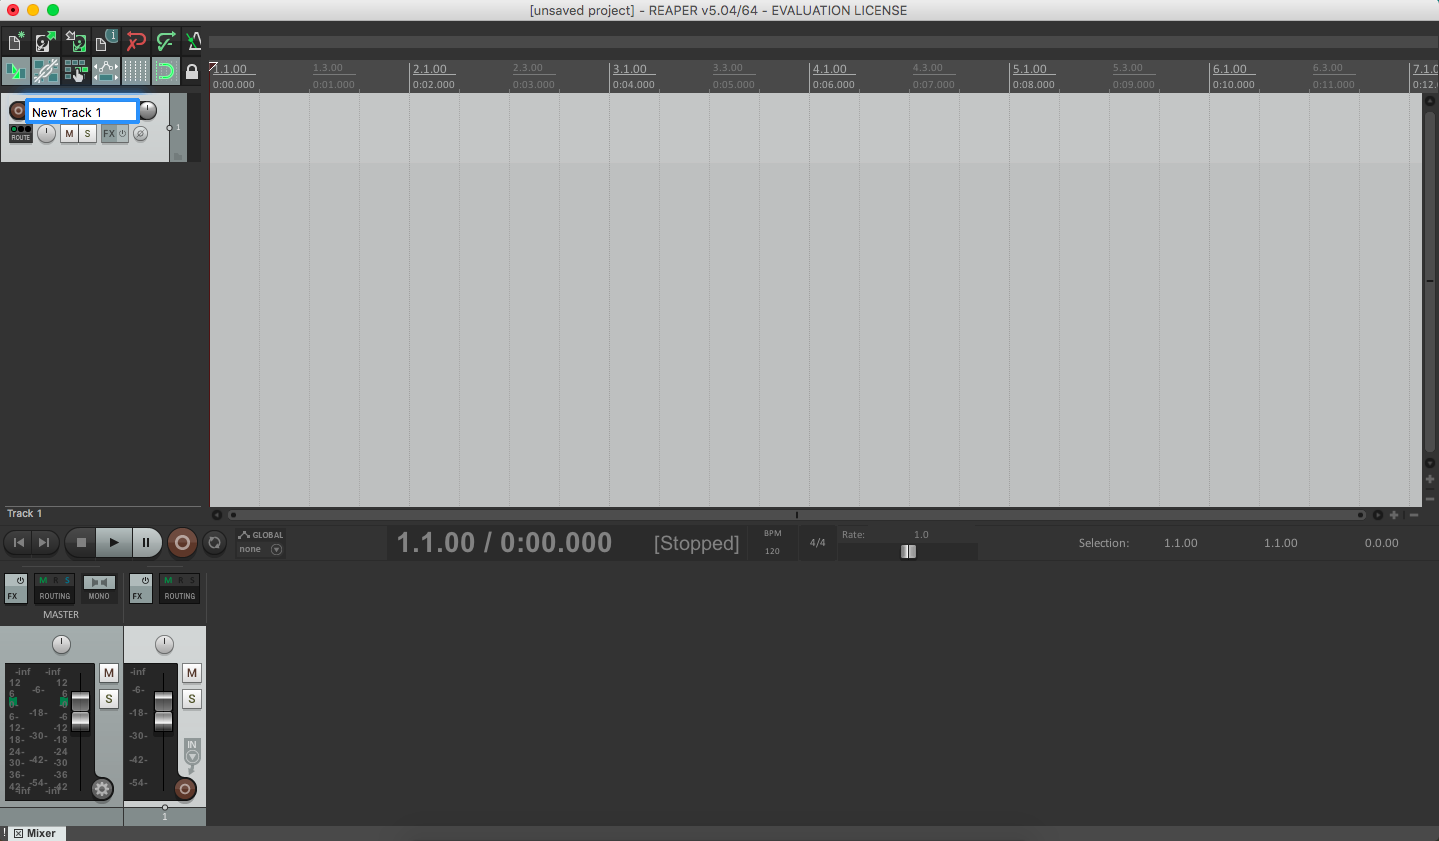
Now what we’ll need to do is create a track to record to. You can either press Control+T (Command+T for Mac) or go up to the “Track” menu and choose “Create New Track.” This is where your recorded audio will go, and you’ll be able to see the “waveform” of your recorded audio.
Before you actually start recording, I recommend to name the track first. It is a good habit to start because then when you go to record, it will automatically name your recorded audio files after the chosen track name. This will make it easier to stay organized and know what’s what, especially when you start working on some larger projects with lots of tracks.
Below is my Reaper session with our new track added. I’ve double-clicked in the new track and named it “New Track 1” as pictured below.
Now you’re almost all set to record. We need to do a couple quick things:
Set the Input on your Track
Before we can start recording, we need to specify which input of your audio interface we want to record from. This will depend on the amount of inputs on your interface. I chose channel 2 on my project because that’s the channel on my interface that has a guitar/instrument input.
Set the Recording Levels
Now’s the perfect time to check your levels. You don’t want your volume too high or it will result in clipping, which will sound nasty and ruin your recording. Try to keep the loudest parts to around -10 dbfs, as shown on your volume meter, and turn down the gain on your interface until you have plenty of headroom to avoid clipping.
Record-Enable your Track
From either the mixer or on the track list, every track has a red circular button. This is the “record-enable” button. This is how you choose which track you’ll be recording to once you hit the record button, so pay extra attention to this button and only have it enabled when you’re getting ready to record.
Setting Tempo and Time Signature
By default, you’ll be on 120 Beats Per Minute (BPM) and in the 4/4 time signature. You can keep the defaults if you like, or otherwise change these settings on your timeline depending on your song.
Hitting Record
Now you’re finally ready! Hit the record button, then the play button. You’ll start to hear the project start off and you can record as you wish.
Saving your Song
You can add as many tracks as you like to layer up your song. Learning to mix is a whole new ballgame, but for now you can play with the basic volume settings and panning from the mixer window. When you’re ready to save your song, you need to first highlight the area you want to export. Do this by clicking along the timeline at the top of the window, and drag the pointers to their correct spots to signal the beginning and end of what you want to export in your music file.
Now from the menus in Reaper, choose File > Render to bring up a page of options. Choose a folder/directory and a file name, and then it’s as simple as clicking “Render” to save your song. By default, you’ll only be able to save to .wav format from within Reaper, however you can download an encoder like LAME to enable you to bounce down to an MP3 file. You may need to do some additional googling to get this working, but it’s worth the effort.
What Comes Next?
An understanding of the basics of recording is essential to making music that you feel proud of sharing. Building your first home studio is one thing, but even now, you’ve probably still realized that there’s a lot you don’t know. If you’ve reached this point, the next logical steps I would recommend are as follows:
1: Learn your DAW. Each DAW is different but will operate a little differently. Take some time to learn the basics of your DAW, including hotkeys and shortcuts to make your work more efficient.
2: Learn more about mixing. Another realization that you’ll come to fairly quickly are that it’s one thing to make the stuff work, and another to be able to make a polished final project. Learning to mix is a long road to go down, but it can be very much worth the effort. Spend time watching tutorials and try not to get overwhelmed – take it one subject at a time.
This page will always be a work in progress. If there’s anything you’d like to see added, feel free to drop me a line using my contact page, or email me at mike@homerecordinglab.com