
How to Build a Home Recording Studio for $500 or Less
It wasn’t that long ago when owning a world-class recording studio was the only way to produce world-class recordings. It meant a major investment in dollars. It took literally millions to acquire serious recording equipment and keep it running in top shape.
Yet Beck’s “Odelay,” Bruce Springsteen’s “Nebraska,” “Of June” by Owl City, and “Wasting Light” by Foo Fighters were all recorded in improvised home studios – bedrooms and garages converted into makeshift recording spaces that produced international hits.
Summary of the Essential Gear
| Name | Pic | Price |
|---|---|---|
| MIC: Audio Technica AT2020 |  | See it on Amazon |
| INTERFACE: Focusrite Scarlett Solo |  | See it on Amazon |
| MONITORS: Presonus Eris 3.5 |  | See it on Amazon |
The digital world impacted music as it has virtually everything else, and the resulting boom in home recording studios is matched by plummeting costs on in-demand equipment. You can record world-class audio for a $500 investment now. You’ll still need some know-how, musical taste, plenty of sweat equity and buckets of luck, but you can make your music – your way – without a big budget facility.
Solving Three Problems
Any recording project has three general requirements:
1: Sound Capture
2: Sound Processing
3: Sound Output
You need a way to collect the sounds needed for your music, the ability to arrange these into a cohesive form, and a playback system that lets you hear what’s really going on in your mix. Your finished product will be a high quality digital file that can be made into CDs or pressed on vinyl.
Your home recording studio must answer these three requirements.
Let’s examine each in greater detail, as well as how they fit together.
The Starting Point
For the purposes of this article, let’s assume that you play instruments or have musicians you want to record, have a computer of reasonably recent vintage, and that there’s a typical home space ready for your studio, whether a bedroom, basement or garage.
What we discuss in this article can be adapted to many recording situations and spaces. It’s typical with home studio projects that, for every solution you create, several more refinements appear. This is normal, but one thing it shouldn’t do is stop you from recording with what you have.
Many projects never get off the ground as their recordists wait for the next piece of the puzzle. There is ALWAYS another piece of the puzzle. Record now.
Sound Capture

For your fundamental studio, sound capture consists of two things:
1. Microphones and other sound-creation sources
2. A computer interface
Microphones and instruments create electrical signals of typically three different levels:
- Mic level – this is the low-level signal produced by a microphone that needs a particular level of amplification delivered by a preamp. Mics typically use XLR connectors and are considered low impedance sources.
- Hi-Z (high impedance) level – guitars and basses generally produce a low-level, high-impedance signal. While it’s sometimes possible to connect these to preamps made for microphones, the sound is flat and lifeless. High impedance sources usually use connectors with ¼-inch phone plugs.
- Line level – also using ¼-inch phone plugs, line level signals usually come from keyboards or contemporary guitar pedals. Your new studio needs at least one microphone and an interface to collect output from the mic and the instruments you’ll be using to make music.
Microphones
You have a tremendous advantage over your home studio counterpart of 30 years ago. The selection and price of microphones available today completely blows away what you could get your hands on a generation ago.
You can use the same mics that musicians use for live gigs, most often a design called dynamic microphones, but you’re better off with a condenser mic. These use a design that’s generally more responsive, producing life-like sounds with a polished quality.
Some samples of affordable condenser mics include:
Audio-Technica AT2020 Condenser
*AUTHOR’S PICK – Best Microphone Under $100

Audio Technica’s AT2020 is a side-address condenser that offers great quality for the price. It has a flat frequency response which makes it versatile without coloring the sound.

Audio-Technica AT2020 Cardioid Condenser Studio XLR Microphone, Ideal for Project/Home Studio Applications,Black
- The price/performance standard in side address studio condenser microphone technology
- Ideal for project/home studio applications; The noise level is 20 dB SPL
- High SPL handling and wide dynamic range provide unmatched versatility
Note: Sponsored link
Behringer C-1 Large Diaphragm Condenser

Whether you’re just getting started or just looking for a low cost way to beef up your mic collection, Behringer’s C1 (Amazon) is an affordable way to go.
Samson C01 Large Diaphragm Condenser

The Samson C01 LDC (Amazon) features a hyper-cardioid pickup pattern, which means that it will slightly more directional than the standard cardioid mic by helping to reject sounds coming from the sides.
Shure PGA181 Condenser

This thing just looks really cool! The Shure PGA181 (Amazon) is another side-address condenser that is rather versatile, thanks to the flat frequency response.
Each of these mics sells for under $100 on the street, and each has “Swiss army knife” characteristics, meaning these will do justice to a wide range of audio signals, from voices to drums to guitars and guitar amps.
Some of these mics are also available with a USB version, so you can connect these directly to your recording computer. USB microphones act as their own audio interfaces.
Audio Interfaces
If you’re using a gig mic or an XLR-equipped condenser mic, you’ll need an interface to convert the analog electrical signal into a stream of digital ones and zeroes for your computer to crunch.
For under $20, there are a number of economy solutions, conventional connectors on one end and USB connectors on the other end. However, you’re limited to one mic or instrument at a time, and you’ll need multiple adapters to record, say, a voice and a guitar.
Instead, it’s easy to take the next step, a dedicated interface that connects to your computer, usually via USB, which also accepts one or more simultaneous connections with some flexibility.
Examples of inexpensive interfaces are:
Focusrite Scarlett Solo 2-in, 2 out USB Interface
*AUTHOR’S PICK – Best Audio Interface Under $100
 The Focusrite Scarlett is a really great piece of gear to start with. It comes in one and two channel versions and has great sounding preamps.
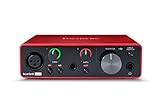
Focusrite Scarlett Solo 3rd Gen USB Audio Interface, for the Guitarist, Vocalist, Podcaster or Producer — High-Fidelity, Studio Quality Recording,...
- Pro performance with the finest pre-amps - Achieve a brighter and a more open recording thanks to the best performing mic pre-amps the Scarlett range has ever seen....
- Get the perfect guitar take - There’s no need to sacrifice your tone with the high headroom instrument input when recording your guitar and basses. Capture your...
- Studio quality recordings for your music and podcasts - You can achieve professional sounding recordings with Scarlett’s high-performance converters which enable...
Note: Sponsored link
Lexicon Alpha 2-in, 2-out USB Interface

The Lexicon Alpha (Amazon) might be a budget option, but for a very small price tag, you get everything you need to start plugging in a mic or guitar and start laying down some tracks.
M-Audio M-Track 2X2 2-in, 2 out USB Interface
 M-Audio’s M-Track 2×2 (Amazon) is a cool looking interface that can record up to 192kHz. It includes a version of Pro Tools and plugins that can get you quickly on your way to creating polished sounding tracks.
PreSonus AudioBox iOne 2-in, 2 out USB Interface
 The PreSonus AudioBox iOne (Amazon) is a nice piece of hardware, and is a great pair with the included StudioOne software and other included plugins.
You can spend more and increase the number of mics or instruments you can record at one time. The Focusrite Scarlett lineup is particularly effective at this, with each model adding more channels, up to the 18i20, with 18 inputs and 20 outputs. However, to keep things under $500, you’ll want to start more modestly.
Each of the interface examples given here have XLR and ¼-inch phone jacks for accepting signals, and each has a Hi-Z switch, so you can plug in a guitar or bass directly and have their unique signals processed correctly.
Odds and Ends
There are many little things that you’ll need, some of which may be laying around or others that can be acquired cheaply. What you need depends on the components you put together for your studio. Necessity is the mother of invention, but some of the items you may need could include:
- Microphone stands
- XLR and ¼-inch phone cables
- Assorted adapter cables for connecting various pieces of equipment
- Pop filter for microphones
Sound Processing

While we’re assuming you already have a computer to process your audio, you’ll need software for the computer to run. This can, potentially, be an expensive proposition.
If it’s your dream to work in a pro studio someday, learning a digital audio workstation (DAW) software called Pro Tools is as close to an industry standard as it gets. However, Pro Tools tends to be pricey. While each DAW has its own way of doing things, once you’re familiar with one, there’s generally common ground when learning others.
To make an affordable start into home recording, look back to your interface. Three of the recommended interfaces listed above come bundled with lite-editions of popular DAW software titles. The M-Track 2X2 comes with Cubase LE, the AudioBox iOne ships with PreSonus Studio One Artist (a mid-level software version, not an entry-level package), and the Scarlett Solo includes a basic, 16-track version of Pro Tools.
With some careful planning, your DAW solution could ship with the interface you purchase. If you prefer to use another DAW or if your interface doesn’t have a software bundle, you have a few options that won’t cost you a penny. Apple computer users have GarageBand software available to them at no charge, but PC users don’t have an officially supported way to take advantage of this intuitive and user-friendly DAW.
Free DAWs
The best free or limited capability DAW packages include:
- GarageBand (Apple only)
- Audacity – free and open source, but with limited capabilities
- Reaper – free to use for 60-day trial period, though this is on the honor system. Discounted license is just $60
- Studio One Prime – free version of PreSonus commercial DAW, with limitations compared to retail packages, but still very useable *AUTHOR’S PICK – Free DAW software
If you do use a limited function edition DAW included with your interface or other equipment, you may find that upgrading to a paid edition is affordable and expands your capabilities. Often, the best DAW software is one that fits your workflow and “clicks” with you intuitively. This may or may not be the one that comes with your device or fits a free or limited function version.
Sound Output

Sound goes into the studio, is processed in the computer, then it emerges for playback. That oversimplifies somewhat, but you’re going to need a way to hear what’s happening as you work your studio magic. You can definitely get started with the computer speakers you already have, or perhaps a pair of headphones or ear buds. However, these solutions are generally limited in their sonic honesty. What you’re hearing may not be “true” to your original sounds.
What goes into a good studio monitor is far beyond the scope of this article. When you start your journey, the word “monitor” itself is a good place to start. Speaker systems that use the term monitor generally imply that these are suitable for recording purposes. However, there’s no standard. It’s up to the manufacturer to designate a product a “speaker” versus a “monitor.”
The most affordable and least confusing way to get into home studio monitoring is to look for active monitors. These have amplifiers matched to the speakers and built-in directly to the cabinet. Simply connect your interface outputs to the active monitor inputs and you’re in business.
Some of the best budget active monitors on the market include:
PreSonus Eris E3.5 Studio Monitors
*AUTHOR’S PICK – Best Small Studio Monitors

For a small pair of monitors at 3.5 inches, the PreSonus Eris (Amazon) offers an accurate sound with some handy features. The power switch, aux in, and headphone jacks are on the front of the speakers are a nice touch so you don’t have to mess around to find them all the time.

PreSonus Eris E3.5-3.5" Near Field Studio Monitors (Pair) – Powered Desktop Speakers for Music Production, Studio-Quality Recording, and Active...
- The reviews speak for themselves!.Waterproof : No
- The only true studio monitor for multimedia, gaming, watching movies, or producing your next hit.
- Now comes included with Studio One Prime and Studio Magic plug-in suite, over $1000 USD worth of music production software.
Note: Sponsored link
Behringer MS16 Powered Monitors

With a slightly larger, 4-inch speaker, the Behringer MS16’s (Amazon) give you some good options for input/outputs, combining an 1/8 inch stereo input with RCA inputs for connecting to a soundcard, keyboard, or other device.
Alesis Elevate 3 MKII Studio Monitors

At only a 3 inch woofer, the Alesis Elevate 3 MKII monitors (Amazon) might not cover as low of a frequency range as the others, but you’ll still get a crystal clear top end. You’ll need to get a feel for how any monitors transfer to other playback systems, but these guys are a solid add to any entry level home recording setup.
Just be sure you know what’s going on with the lower-end frequencies, and test your mix on as many sources as possible!
Each of these monitor solutions come in under $100 for a pair. However, the woofers – the large speaker in each cabinet – are 4 inches or smaller. This limits the depth of bass the speakers can reproduce. If you’re into dance or electronic music, you may need to add a subwoofer to get the deep bottom end you’re after.
Generally, the larger the monitors, the better the bass response, but adding monitors later is a common upgrade to a home studio. Start modestly and develop your tastes and needs before shelling out big bucks.
A Note About Headphones
You can use headphones to record, playback and mix your music. In many home studio situations, it’s not optional to prevent others nearby. However, using headphones rarely results in translatable mixes. That is, your finished product, after recording and mixing in headphones, will probably sound vastly different when played back on other systems. Record with headphones, certainly, but try to mix through monitors when possible, as you learn your craft.
Putting It All Together
So, there’s your $500 studio:
- Microphone under $100
- Interface under $100
- DAW free or included with interface
- Monitors under $100
You’re thinking this is a $300 studio, aren’t you? If only life were so easy. Don’t forget about those miscellaneous items under the Sound Capture section. If you’re a smart shopper you can pick these up on the cheap, used stock, garage sale finds, etc., but you’ll still need to shell out for odds and ends.
Then it comes to your studio room itself. You’ll need a desk, a chair and various other furniture, depending on who and how many you’re recording.
Another very real consideration is the acoustics of your room. If you’re like the vast majority of home studio people, you’re in a rectangular room with parallel walls and parallel floor and ceiling. Guess what is one of the worst shapes for good acoustics. Yep, the typical suburban home extra bedroom.
If you’ve got budget left over, acoustic treatment is the best thing you can do to get real sounding tracks from your affordable equipment. The good news with acoustic treatment is that it can be done in stages and logically. Skip the egg crates though, since they don’t do much except look like egg crates.
Use commercial products designed for acoustic treatment. It might look like any old foam, but it’s not. Proceed through acoustic treatment like so:
1. Speaker Isolation – mount your speakers on purpose-made stands with speaker isolation foam underneath. Arrange your studio monitors in a nearfield triangle with your head as the third point, about three feet on each side, and that isolation will generate dramatically improved sound.
2. Wall reflections – acoustic treatment foam directly behind the monitors is the place to start. The wall behind you is the second place, and the ceiling above the listening position is number three. Improvements started with speaker isolation will continue as you add more reflection treatment.
3. Corner bass traps – foam wedge bass traps in the corner along the ceiling is usually a good spot to kill any muddiness in the bottom end. If you’re near wall corners, add bass traps there too.
As you’re getting the money together for acoustic treatment, your friend in the meantime is close miking. Keep your microphone as close as possible to sound sources to reduce or eliminate reflected sound that may interfere with your natural signal. Soundproofing – which is something different from acoustic treatment – costs tens of thousands of dollars. Close miking costs nothing. Where do you want to start?
Congratulations!
If you’ve made it through this article, assembled your fundamental equipment and you have a few hours where your screamy kid sister is out of the house, you’re ready to make some tunes, or at least get familiar with your equipment and software. There’s a lot to learn, but the rewards are substantial.
The learning curve never ends in the recording business. There’s always something new to know, whether it’s new equipment or old techniques. You’ve also joined a community where the members love to share what they know. Venture forth, experiment, ask questions, read, listen and the learning will take care of itself.
Now get recording!